

Bridging the Gap: Transitioning Hex Grids from Wall to Ceiling
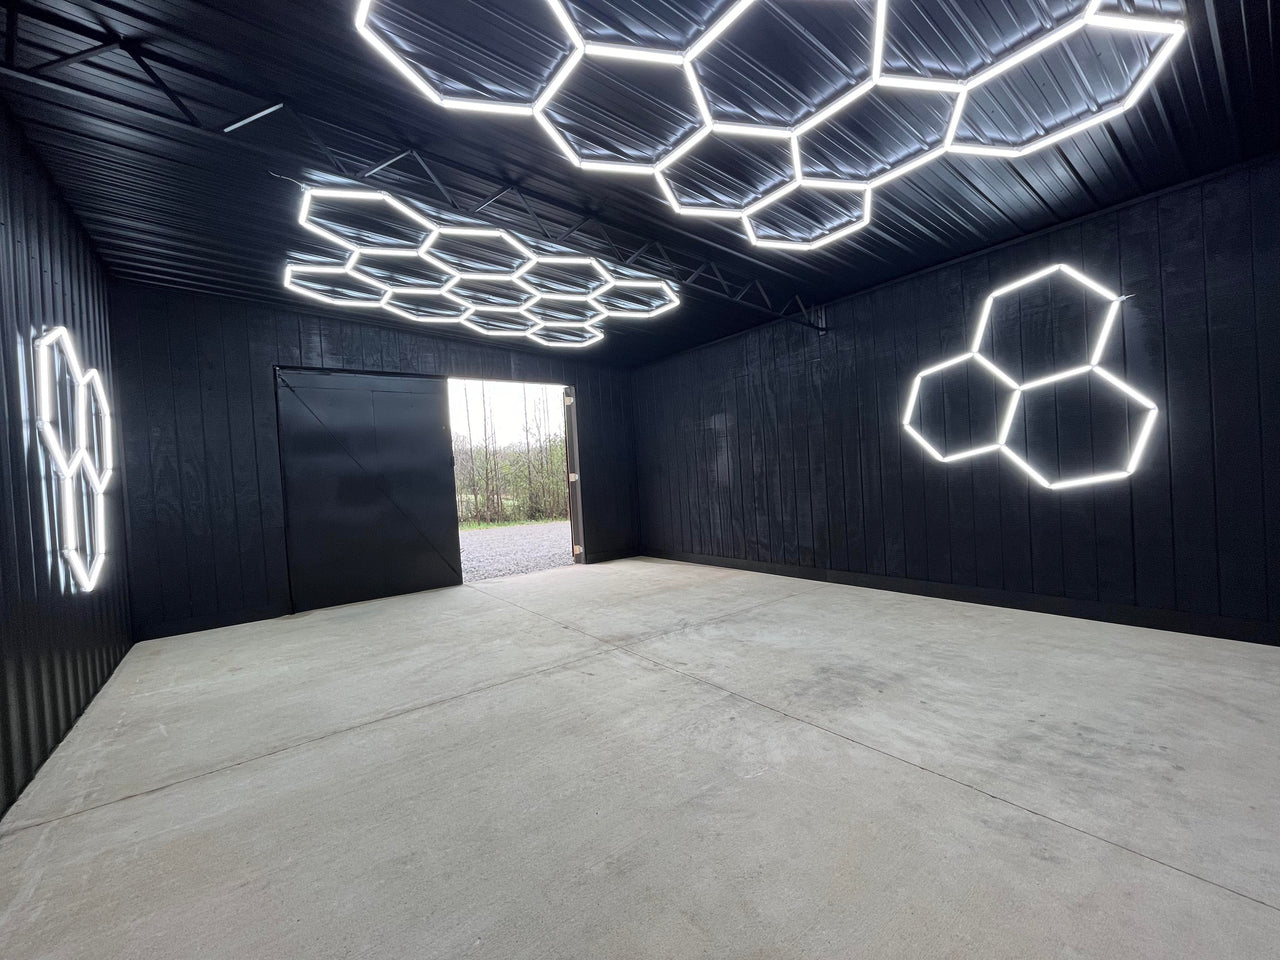
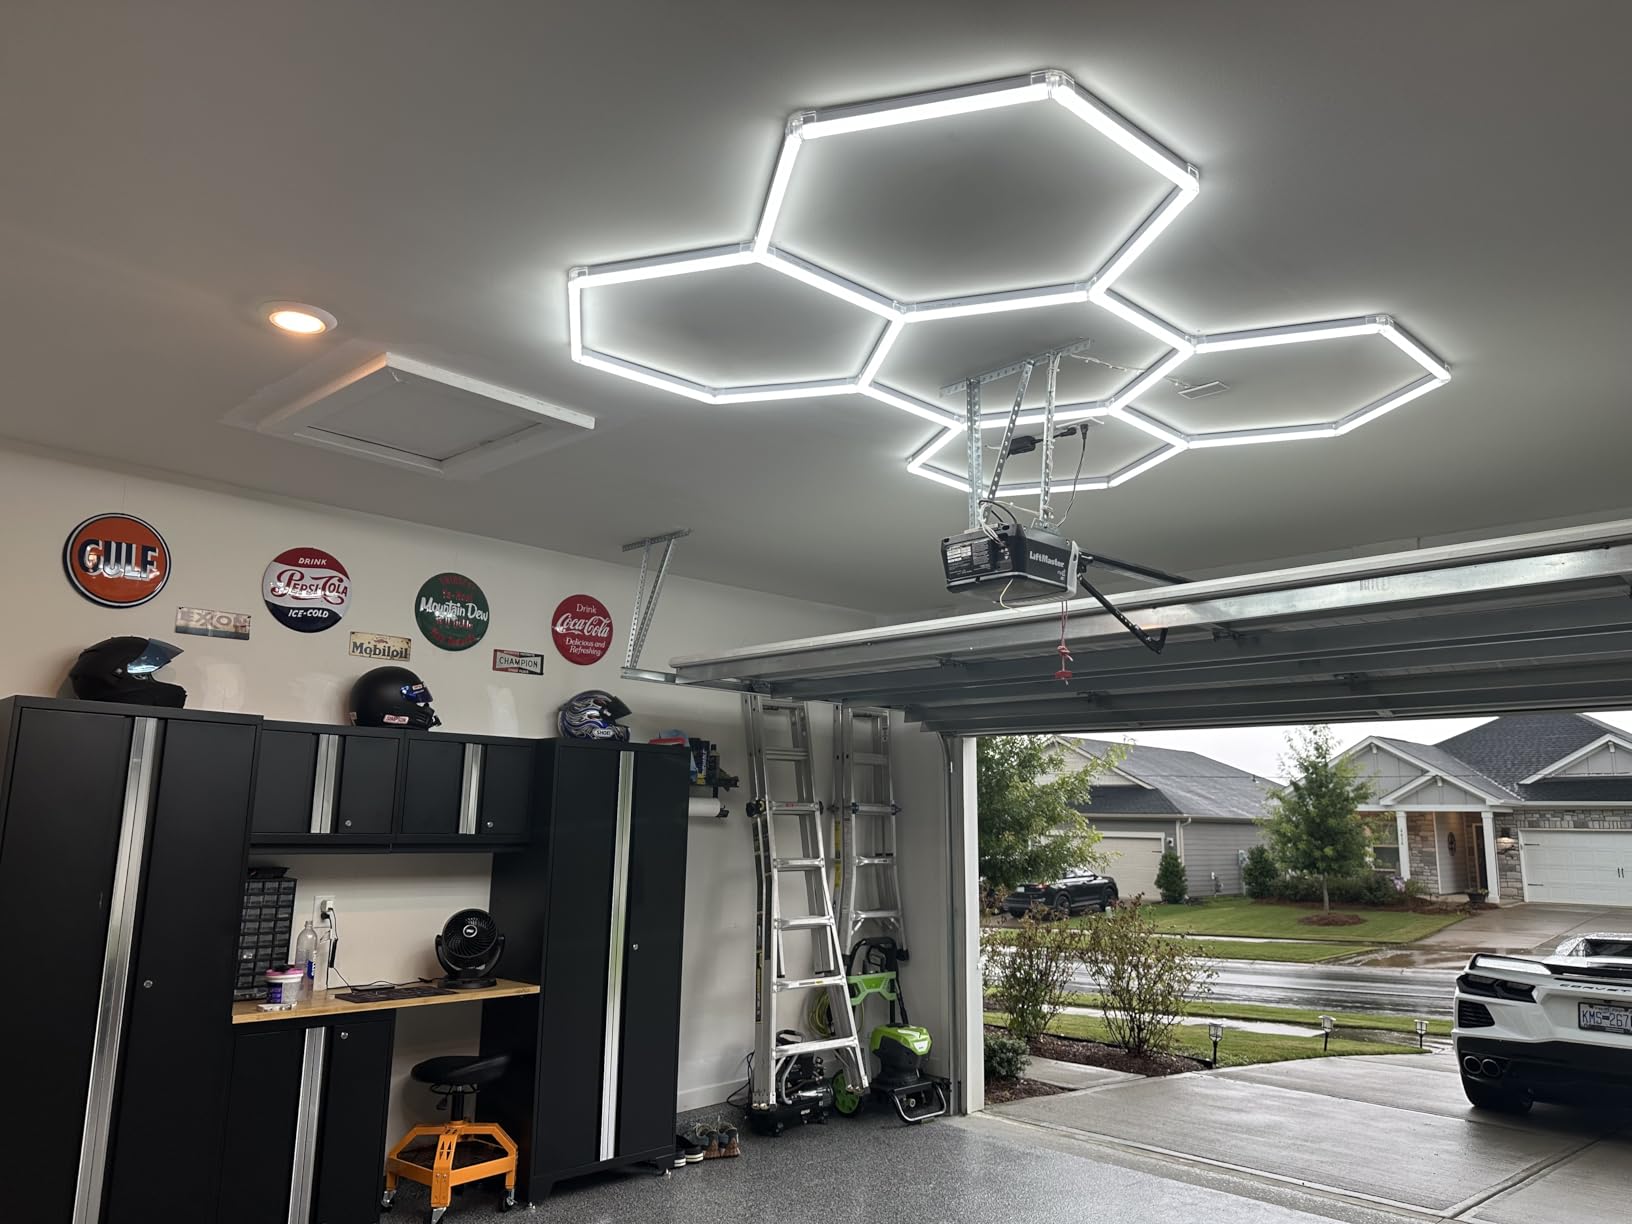
Imagine walking into your garage or home gym and being greeted by a seamless, glowing honeycomb of light that doesn't just sit on the ceiling but cascades down the back wall, framing your squat rack or your favorite project car. It is the ultimate "wow factor" for any DIY enthusiast. This isn't just about lighting a room; it’s about creating an immersive environment.
However, moving a modular hexagon grid from a flat horizontal plane (the ceiling) to a vertical one (the wall) is where most DIY projects hit a technical wall. You aren't just snapping tubes together anymore; you are managing structural gravity, complex electrical distribution, and visual geometry that can play tricks on the eye.
In this guide, we’re going to walk through the pro-grade heuristics and technical "gotchas" we’ve identified through years of supporting complex installs. We’ll show you how to reinforce those tricky 90-degree joints, how to "split the feed" to keep your brightness consistent, and why an intentional visual offset is actually the secret to a professional-looking finish.
The Structural Reality: Engineering the 90-Degree Transition
When you build a grid on a single plane, the connectors are mostly under compression or light tension. But the moment you turn a corner, gravity becomes your biggest opponent. The 90-degree joint—where the wall meets the ceiling—is the weakest point both structurally and visually in any wrap-around layout.
Reinforcing the Corner
Standard kits usually come with V-connectors (two-way) and Y-connectors (three-way). In a flat ceiling install, these are more than sufficient. For a wall-to-ceiling transition, however, practitioners often find that the weight of the wall-mounted tubes can cause a slight "sag" at the corner, leading to a gap in the light or, worse, a disconnected circuit.
The Pro Tip: Use a combination of V and Y connectors to create a "braced" transition. If your layout allows, try to have a Y-connector sit right at the corner line. This provides three points of contact rather than two, distributing the mechanical stress more effectively.
The "Museum Putty" Trick: Based on common patterns from customer support and real-world repairs, we’ve found that adding a small dab of clear, non-permanent adhesive (like museum putty) on the connector tabs provides just enough "grip" to prevent vibration-induced separation. This is especially vital in garages with high-vibration environments, like those near heavy machinery or loud sound systems. It keeps the PC (polycarbonate) material safe without the permanence of superglue.
Logic Summary: We recommend mechanical reinforcement (Y-connectors) and friction-enhancers (museum putty) because the lever-arm effect of wall-mounted tubes puts disproportionate stress on the corner junction.
Power Distribution: The "Split the Feed" Method
One of the most common mistakes in large wrap-around projects is running the entire grid from a single power input at one end of the wall. Because LED hexagon tubes are modular, the electrical current has to travel through dozens of tiny internal connections. By the time the power reaches the far end of the ceiling, you’ll notice a "dimming" effect known as voltage drop.
Combating Voltage Drop
If you are installing more than 60 tubes, a single power injection point is usually insufficient. According to the NFPA 70 – National Electrical Code (NEC), all electrical installations must account for continuous load and circuit capacity.
The Workaround: Instead of starting at the bottom of the wall, plan your layout so the main power cable connects at the central transition zone—the very corner where the wall meets the ceiling. From this central point, you "split the feed," sending power down the wall and across the ceiling simultaneously. This effectively halves the distance the current has to travel to reach the farthest tube, ensuring that the first hex and the last hex have the same 5000K daylight crispness.
The 80% Rule for Drivers
When sizing your power supply, always follow the NEC 80% rule: do not load a circuit or a driver to more than 80% of its rated capacity for continuous use (defined as 3 hours or more). If your total tube wattage is 400W, you should be looking at a power distribution system capable of handling at least 500W to ensure longevity and safety.
Methodology Note: This "Split the Feed" heuristic is derived from standard electrical engineering principles to minimize resistance across modular series-parallel circuits.
Visual Mastery: The Offset Heuristic
Here is a secret that many pros won't tell you: trying to align a hexagonal pattern perfectly across a 90-degree corner is nearly impossible. Due to the thickness of the connectors and the slight variances in wall-to-ceiling angles (which are rarely a perfect 90 degrees in residential construction), a continuous pattern often looks "forced" or slightly crooked.
The Pro Heuristic: Intentionally offset the grid by half a hexagon width at the transition.
By shifting the ceiling grid so that the points of the hexagons don't try to "kiss" the points of the wall hexagons, you create a deliberate visual break. This looks like a conscious design choice rather than a failed attempt at a continuous line. It also gives you more flexibility to hide the power cables that might be jumping the gap between the two planes.
Performance & Safety: Beyond the "Wow Factor"
While the aesthetics are what get you excited, the technical specs are what keep you safe. When you're wrapping lights around a room, you're essentially building a large-scale electronic appliance on your walls.
Safety Certifications Matter
For any B2C DIY project, ensure your components carry a UL Listed or ETL Listed mark. These certifications prove that the product has been tested to meet North American safety standards, specifically UL 1598 for luminaires. In a garage environment where dust and moisture can be present, choosing products with an IP65 rating (IEC 60529) ensures the internals are protected from the elements.
Understanding the "Performance Grade"
Don't just look at the wattage. Look for the IES LM-79-19 report, which is the "performance report card" for LEDs. This report confirms the actual lumen output and CRI (Color Rendering Index). For detailing work or home gyms, you want a CRI of 80 or higher to ensure colors look natural and you can spot imperfections in paint or form.
For a deeper look at how these standards are evolving, check out the 2026 Commercial & Industrial LED Lighting Outlook: The Guide to Project-Ready High Bays & Shop Lights.
Scenario Analysis: The "Premium Aesthetic" Home Gym
To help you visualize the impact of a wrap-around install, we modeled a scenario for a high-end home gym enthusiast. This user wanted a dramatic "cage" effect using a massive hexagon grid across a 24' x 18' space.
Modeling Note (Reproducible Parameters)
This is a scenario model based on common industry heuristics, not a controlled lab study.
| Parameter | Value | Unit | Rationale |
|---|---|---|---|
| Area Dimensions | 24 x 18 | ft | Standard 2.5-car garage/gym conversion |
| Total Tube Count | ~139 | count | Estimated for wall-to-ceiling wrap-around |
| System Power | ~973 | W | Based on 7W per tube (Hyperlite spec) |
| Power Injection Points | 3 | count | Required to meet 440W daisy-chain limit |
| Annual Usage | 1,460 | hours | Based on 4 hours/day gym usage |
| Electricity Rate | 0.16 | $/kWh | US National Average (2024) |
The "Impact" Insight
In this scenario, the user is prioritizing visual impact over energy efficiency. Because this grid is significantly larger than a standard 2-tube fluorescent fixture, the annual electricity cost actually increases by roughly $150.
However, the "return on investment" here is found in the functional uniformity of the light. By wrapping the light from wall to ceiling, you eliminate shadows during floor exercises (like planks or stretching) that traditional overhead-only lighting creates. Adding a smart occupancy sensor can further optimize this, with an estimated payback period of just 1.6 years for the sensor cost itself.

What to Expect: Installation Checklist
If you're ready to bridge the gap, here is your pre-flight checklist:
- Map the Grid: Draw your layout on graph paper first. Mark your 90-degree transition line.
- Identify Power Points: Based on the "Split the Feed" method, locate your outlets near the ceiling/wall corner.
- Check Surface Compatibility: Ensure your wall and ceiling materials can support the weight. For drywall, use the included screw-mount clips rather than just adhesive.
- Verify Components: Ensure all tubes and connectors are from the same generation to maintain ANSI C78.377 color consistency.
Frequently Asked Questions
- Can I use these in a damp garage? Yes, provided the components have an appropriate IP rating. Most high-quality hex kits are designed for indoor use but can handle the ambient moisture of a garage if they are UL/ETL listed for damp locations.
- Will the lights flicker if I dim them? Hexagon lights are generally non-dimmable unless specifically paired with a compatible 0-10V or TRIAC dimmable driver. Always check the manufacturer's FAQ or support page for wiring diagrams.
- How do I clean them? Use a microfiber cloth and a gentle, non-abrasive cleaner. Avoid spraying liquid directly onto the connectors.
YMYL Disclaimer: This article is for informational purposes only. Electrical work involves risks of fire and shock. Always consult a licensed electrician and follow your local building codes and the National Electrical Code (NEC) before performing any wiring or structural modifications.


